
My final project was a VERY last minute thing! Instead of utilizing the entire two weeks that I had, I put this thing together in two nights. I do, however, think it will be a whole lot faster for you as you won't have to do the math on this! Being that this was a first run, I have some tips that might help as there are a few changes that would make this a better picnic tote. So, bare with me here.
Items needed:
1.5 yards each of two contrasting fabrics (you could use less, but I would rather have extra)
snap kit (I got it at walmart. It was a cheap set with little tools included)
Hammer
thread
1 spool grosgrain ribbon or fabric for straps
Dishes
1 yard contrasting fabric
1 yard vinyl
2 insulated grocery bags or Insul-Brite (insulation material)
2 yards extra firm stabilizer
1. Cutting.

The above diagram shows you exactly what you need to cut and the sewing lines that we will deal with later. You're going to cut a T shape that measures 34" by 30". Then cut 2 or 3 pockets, measuring 5"x18". You need one of each piece of fabric as the pockets are lined. So, if you're doing 2 pockets, you should have 4 pieces. I only did 2 pockets for the inside, but originally planned to put one on the outside. Your choice. I cut one "T" out of each fabric. The mums fabric is on the outside and the vines on the inside. 2 pockets were mums. If you decide to put a pocket on the outside, it would be the vines fabric.
DON'T FORGET TO ADD YOUR SEAM ALLOWANCES! These measurements are for your final project.
now cut the stabilizer. You will need to cut it in two pieces. One will be 30x12 and the other will be 22x18. These pieces will make up the measurements of the T shape.
Cut two more pieces of stabilizer 5x18 (for the pockets - three if youre making a pocket for the outside).
2. cut the insulated bags.

I basically cut the insulation out of these bags that i NEVER use! Just rip it all apart.
3. Sew extra firm stabilizer.

I sewed the insulation together so that it would measure the same as the T shape. Zig zag stitch your stabilizer together to make the T shape. Then, sew the insulation right to the stabilizer. make sure you pin them together because the insulated fabric slips.
4. Sew your pockets.

Sew the stabilizer to the wrong side of your pocket piece.

Take your contrasting pocket piece and sew it, right sides together. The stabilizer will be on the outside.

Clip the two corners.

Turn right sides out and shape your corners.

Your pocket should now look like this.
Repeat for the remaining pocket(s).
5. sewing the pockets on.

At this point you may need to refer back to the diagram for measurements and such.
Sew the pockets on to the T. with the front side of your pocket touching the right side of your inside T. Sew the bottom part of the pocket down.

flip the pocket right side up and iron the seam flat.

Sew your pocket down on the sides and make your pocket stitches. I made mine 4 inches from the edge. Here is where I make a suggestion. Make smaller pockets... individual pockets for silverware.
6. Sew on the insulation.

Lay your insulation/stabilizer layer on top of the T you were just working with, so that the insulation is touching the wrong side of the fabric. Simply straight stitch the insulation to the fabric.
7. Sew on the contrasting T.

Sew the two T pieces together, wrong sides together.
Once you have the pieces attached, you are going to sew the "sew lines" that are marked on the above diagram. This will help your tote bend properly and help it stand up.
8. Trim your edges.
Make sure to trim your edges close to the seams.
9. Make and sew your binding.

Iron your ribbon in half or make bias tape out of your fabric.

Sew your ribbon onto the edges of your T shape.
10. making your corners.

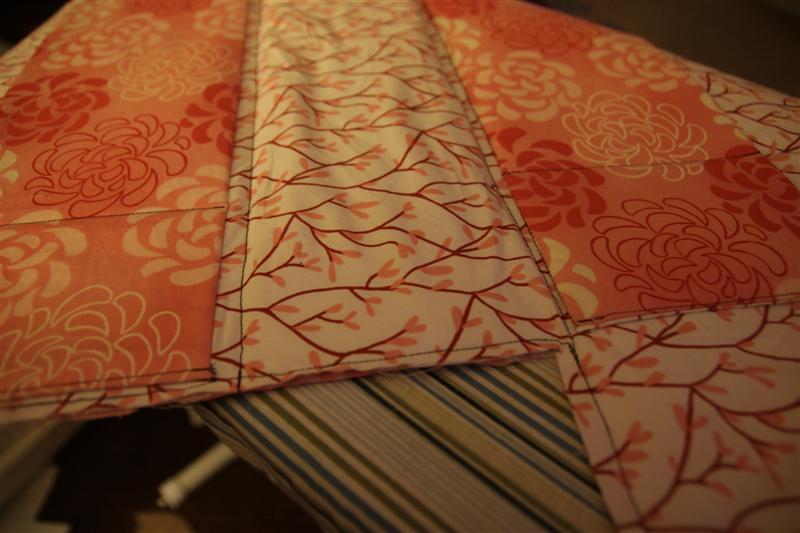
Stop sewing your ribbon when your needle touches the seam you made to attach your two t shapes together (the line you see by my fingers). Lift your presser foot and bend the ribbon as in the photo below.

You will have half of the fabric bent under the next side.

Now bend the other side over. You should now have a nice edge.
11. sew on the straps.

Cut the rest of your ribbon in half. Pin the ends to the outside of your bag. Sew a square shape on the bottom part of the strap. Make it big. I sewed it from the bottom of the ribbon to the pin in the above picture. about 2 - 2.5 inches. Then sew an X from corner to corner of the square you just sewed.
12. Attach your snaps.
Unfortunately, I didn't take photos of this. I evenly spaced them on the top flap of the tote and the sides. Just follow the directions on your package of snaps. It's pretty self explanatory, but if you need help, just let me know.
13. Blanket.

Simply follow the directions for the outdoor play mat. The only thing I did differently with this, is skipping the strap and fastener. it's just a flat blanket.
No comments:
Post a Comment