
Angie at Treasures for Tots send this fun tutorial. It's so perfect for this week!
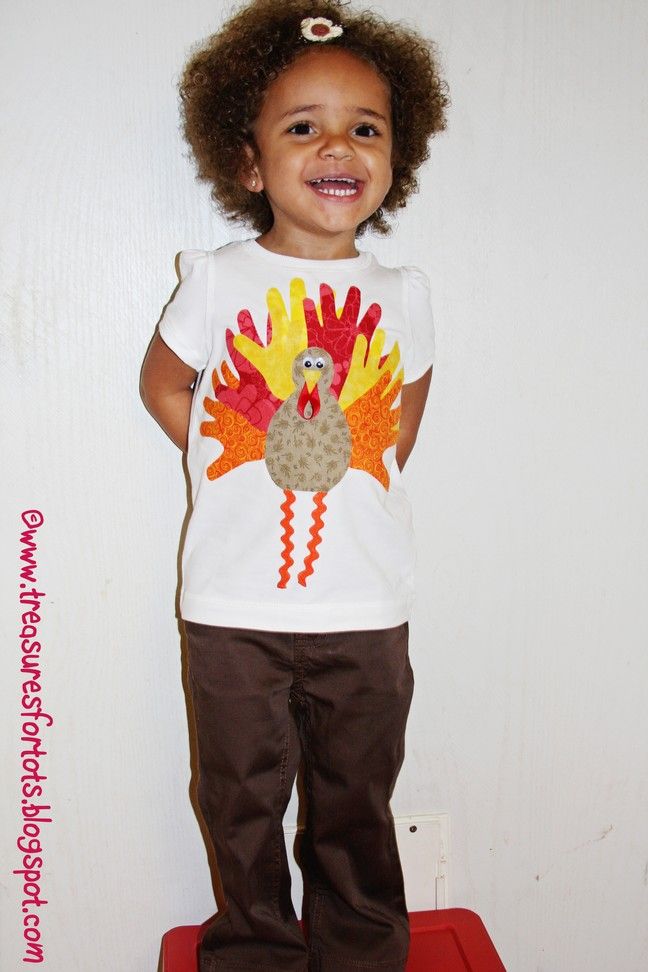
This is a very easy, NO-SEW turkey applique you make using your child's hands! Similar to the hands and feet turkey craft projects kids do in school - but with fabric. It's a great project to do with your child too since it's mostly just cutting and gluing!
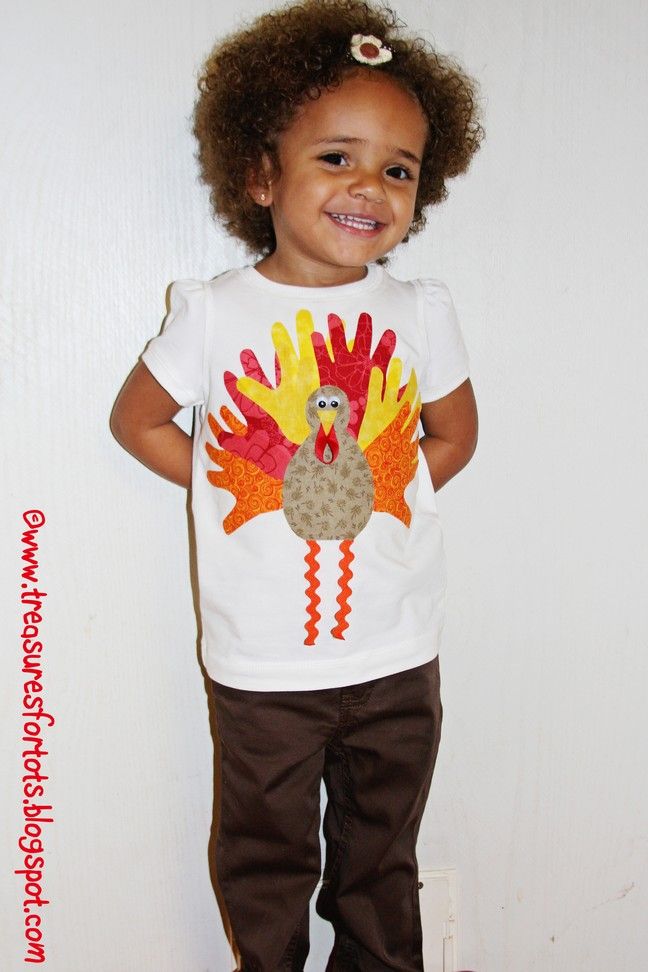
It's a cute shirt for girls and boys!
Materials needed:
White tee shirt
Heat 'n Bond
(the red package)
2 3" pieces of medium orange Rick Rack
(I have jumbo yellow pictured, but I changed my mind)
1 1 1/2" piece of 3/8" red ribbon
4 pieces of 9"w x 5 1/2"l fabric in red, orange, yellow, and brown
(this depends on how big your child's hands are)
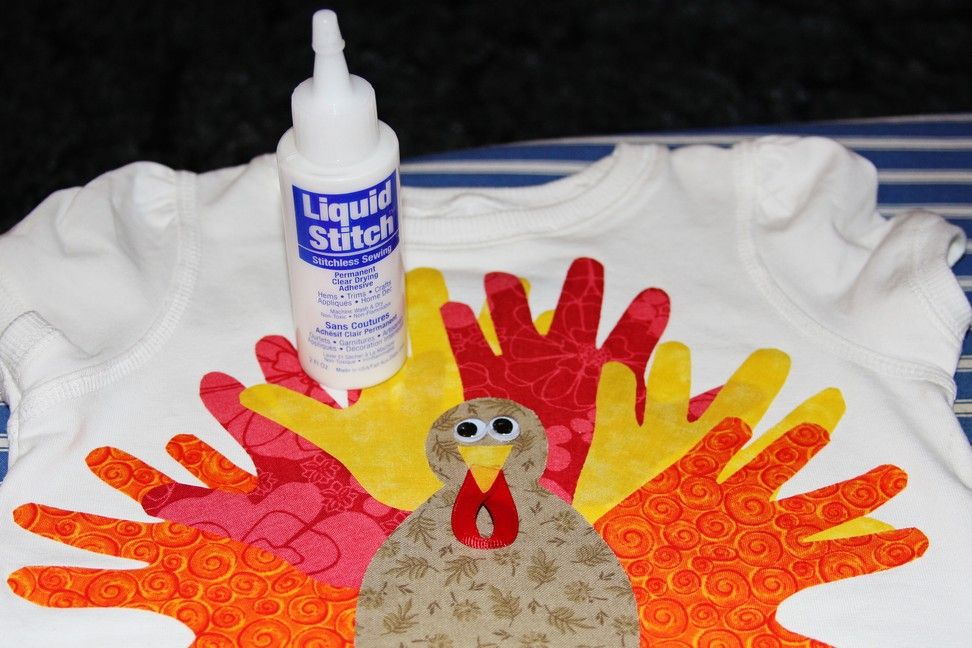
Liquid stitch
2 googly eyes
lighter or fray check
White tee shirt
Heat 'n Bond
(the red package)
2 3" pieces of medium orange Rick Rack
(I have jumbo yellow pictured, but I changed my mind)
1 1 1/2" piece of 3/8" red ribbon
4 pieces of 9"w x 5 1/2"l fabric in red, orange, yellow, and brown
(this depends on how big your child's hands are)
Liquid stitch
2 googly eyes
lighter or fray check
I used this picture for the turkey's body and it's beak, but you could draw your own or use your child's feet.
Trace your child's hands on a piece of paper and cut out them out to use as templates.
Print and cut out this turkey picture to use as a template for the turkey's body and beak.
Print and cut out this turkey picture to use as a template for the turkey's body and beak.

Following the directions on the the Heat 'n Bond package, apply the Heat 'n Bond to all the fabric.
Using the templates, cut out the hands, the turkey's body, and it's beak.
Sorry I forgot to put the turkey's body and beak in this picture!
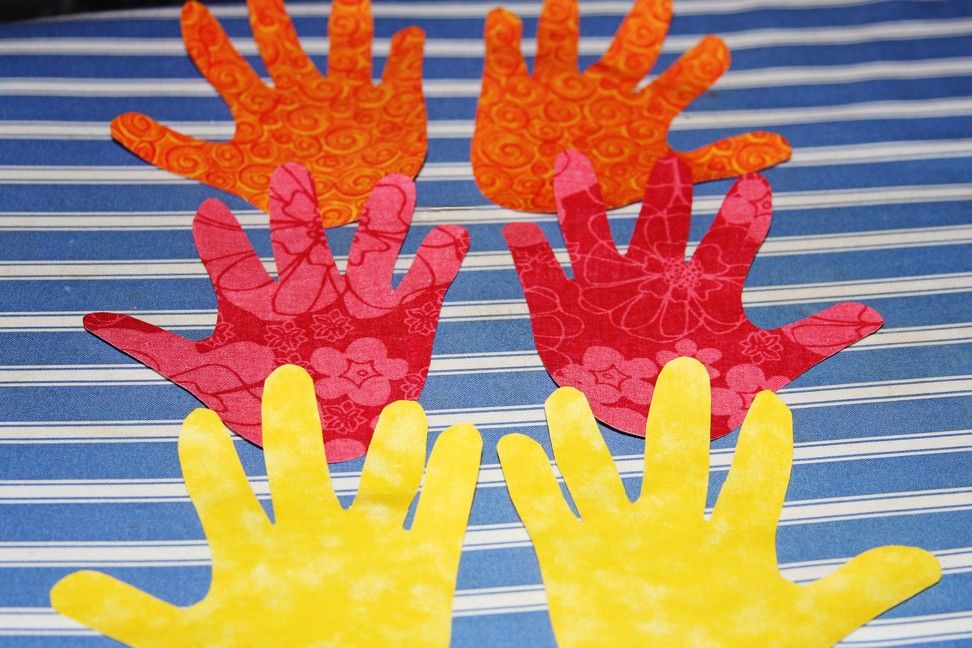
Using the templates, cut out the hands, the turkey's body, and it's beak.
Sorry I forgot to put the turkey's body and beak in this picture!
Make sure you use a lighter or fray check to seal both ends of the ribbon and Rick Rack.
Fold the piece of red ribbon to form the turkey's wattle, then glue it together using Liquid Stitch.
I put it on the turkey's body to get an idea of how it would look:
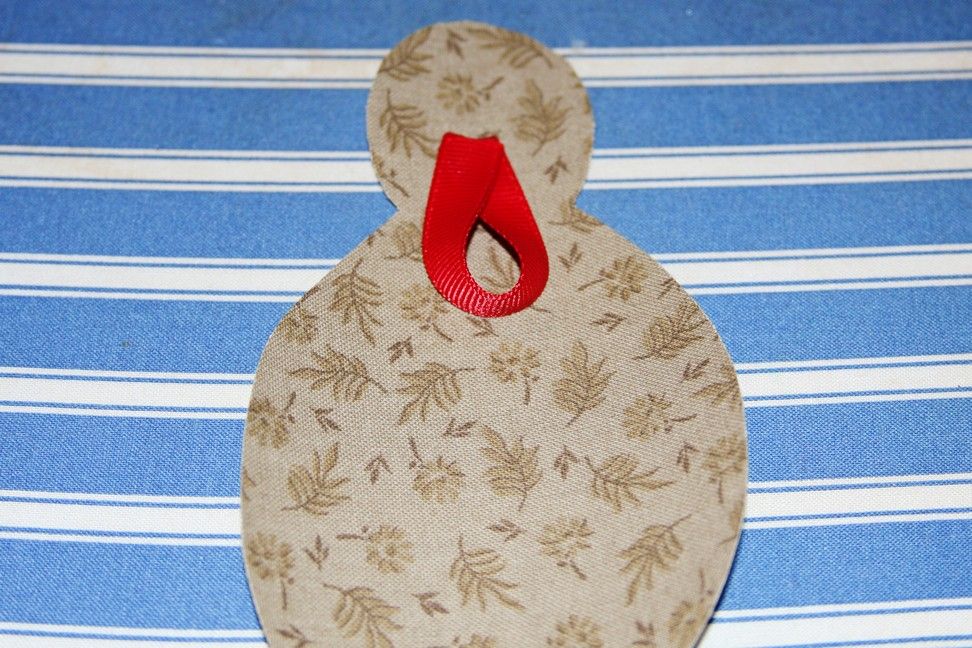
Fold the piece of red ribbon to form the turkey's wattle, then glue it together using Liquid Stitch.
I put it on the turkey's body to get an idea of how it would look:
Arrange the hands on the shirt how you'd like them, and iron them down one by one.

Place the turkey's body in the middle, and use Liquid Stitch to glue the Rick Rack to the shirt underneath - those will be his legs.
Now iron down the turkey's body.
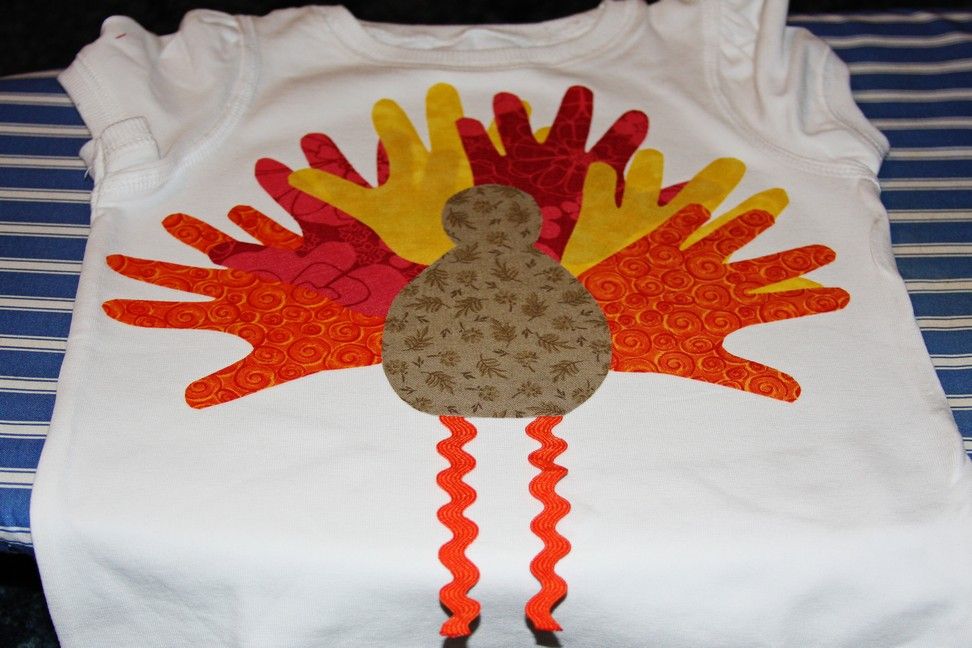
Now iron down the turkey's body.
Using the Liquid Stitch again, glue the turkey's wattle to his body.
Arrange the beak slightly over the wattle and iron it down.
Use Liquid Stitch to attach the googly eyes to the turkey.
Arrange the beak slightly over the wattle and iron it down.
Use Liquid Stitch to attach the googly eyes to the turkey.
All done! Look how cute it looks on Serenity!
POST-IT-NOTE: I ended up using the medium orange Rick Rack 'cause I think it looks better. I have no idea what I was thinking when I got that big jumbo yellow pack for this project!
TIP: If some of the fingers won't stay ironed down, just use a little Liquid Stitch to get 'em to stick! Hand wash, or turn the shirt inside-out before washing in cold water on the gentle cycle. I would totally recommend using homemade laundry soap or Charlie's soap!
Total cost:
I bought a fat quarter in each color for a $1 a piece at Wal-Mart - I have plenty of fabric left.
The shirt was $4.99 at Target (Serenity's pants are from Target too - $6 in the store).
The Rick Rack was $1.14 for a 2 1/2 yard pack - I used 6 inches total.
The red ribbon is 24¢ a yard - I only used about 1 1/2 inches.
A pack of 50 googly eyes is 97¢ - I have 48 left.
I bought the Liquid Stitch about a week or so ago - so I didn't need to buy anymore.
All together, this project costs around $6 or so?
I don't know exactly since I'm horrible at Math - I just know it was pretty cheap!
Have fun!
No comments:
Post a Comment