**** First and foremost... I'm posting this disclaimer:
If you are going to make these lights the same way that I did, you MUST follow my directions for attaching them to the lights exactly how I explain them as to avoid any electrical fires. We are working with electricity here, people! To avoid any hazards, it is best to follow my suggestions instead.
Items needed:
LED Christmas lights****
crepe or tissue paper
floral tape
1. Cut circles out of your crepe or tissue paper in the desired size of your flowers. Mine were about a 3" radius. Each flower is 4 layers of paper. I cut mine with pinking shears, but you do not need to.

2. Fold the 4 layers in half.

3. Fold it in half again.

4. cut off the tip of the corner. VERY small amount.

5.Open up your flower. This is what you should have.

**** Here is my big disclaimer. I suggest using floral tape to attach the flowers to your lights instead of doing the steps I used below. It wouldn't be any more difficult than the way I did it. Otherwise, follow this just right.
6. Take the light apart. You really should use LED lights because they throw a LOT less heat. Using standard christmas lights may result in a fire. If you are not using LED, USE CAUTION!

7. Slide your circles onto the bottom of the light... Make sure the paper is NOT touching any part of the metal contacts!!!!!!!!!!!!!! These directions are from my electrician husband. He would much rather everyone use the floral tape :)

8. Place the light back into the base.

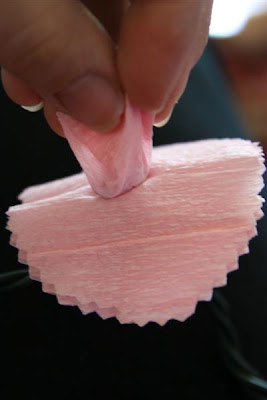
9. pull the first layer of paper up and scrunch it together. Continue with each additional layer.

10. You should now have this:

Top view:

11. Fluff each layer so you now have this:


No comments:
Post a Comment