
It is durable enough to hang in an outside eating area:
It is simple enough to rest on a side table:
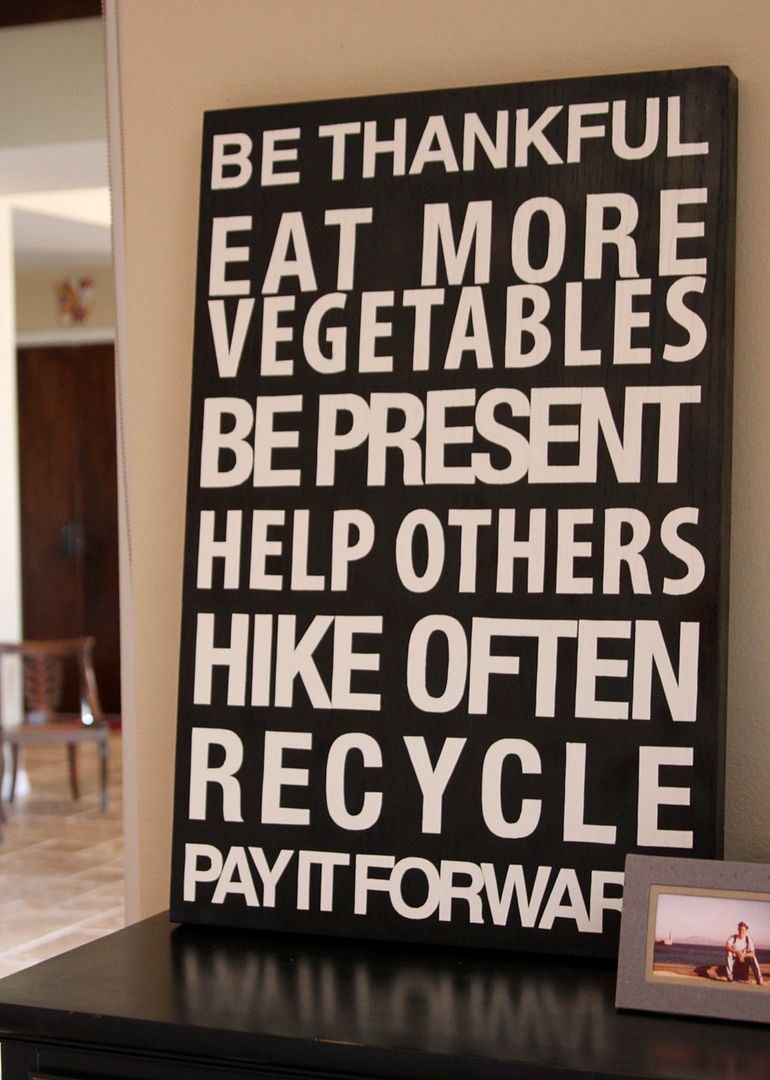
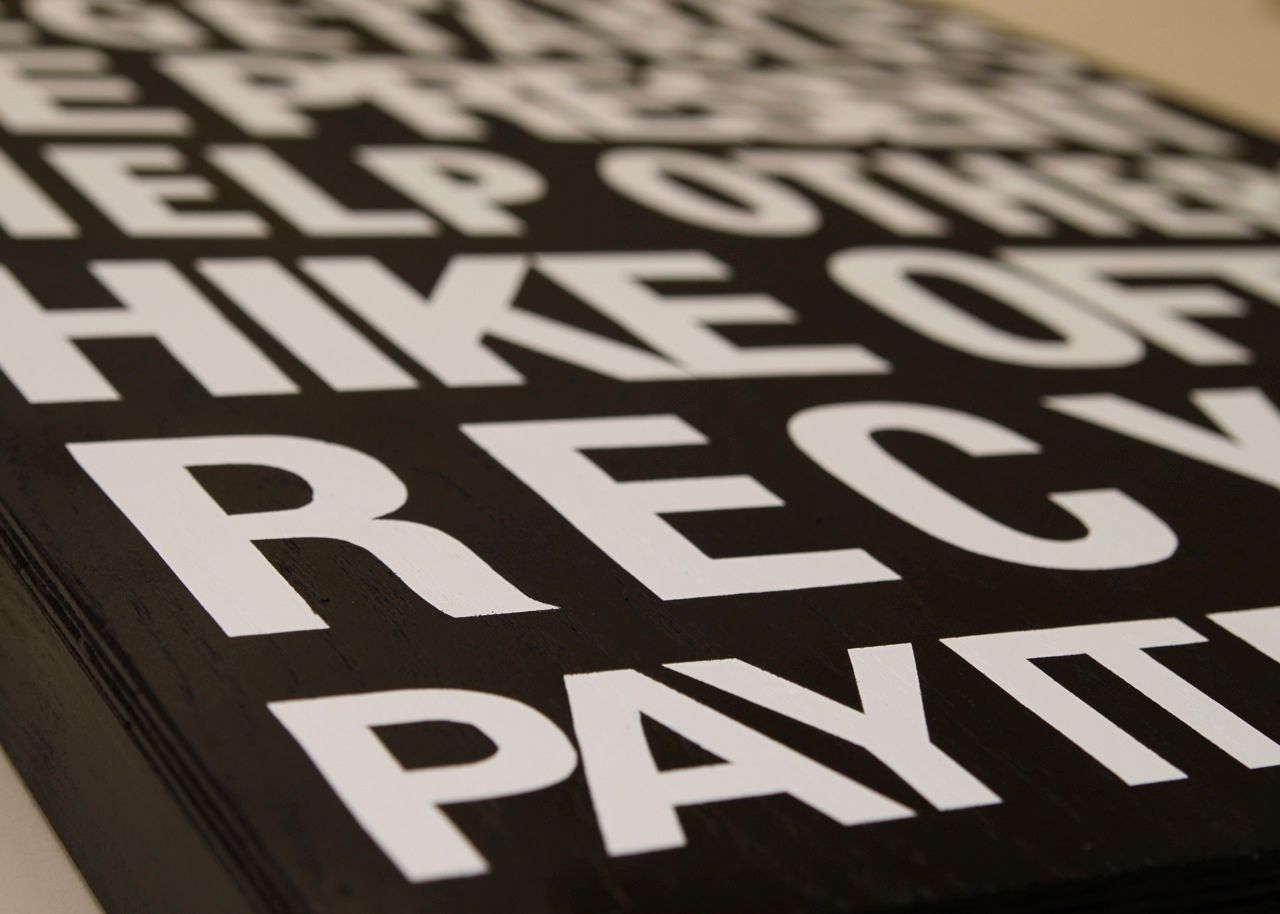
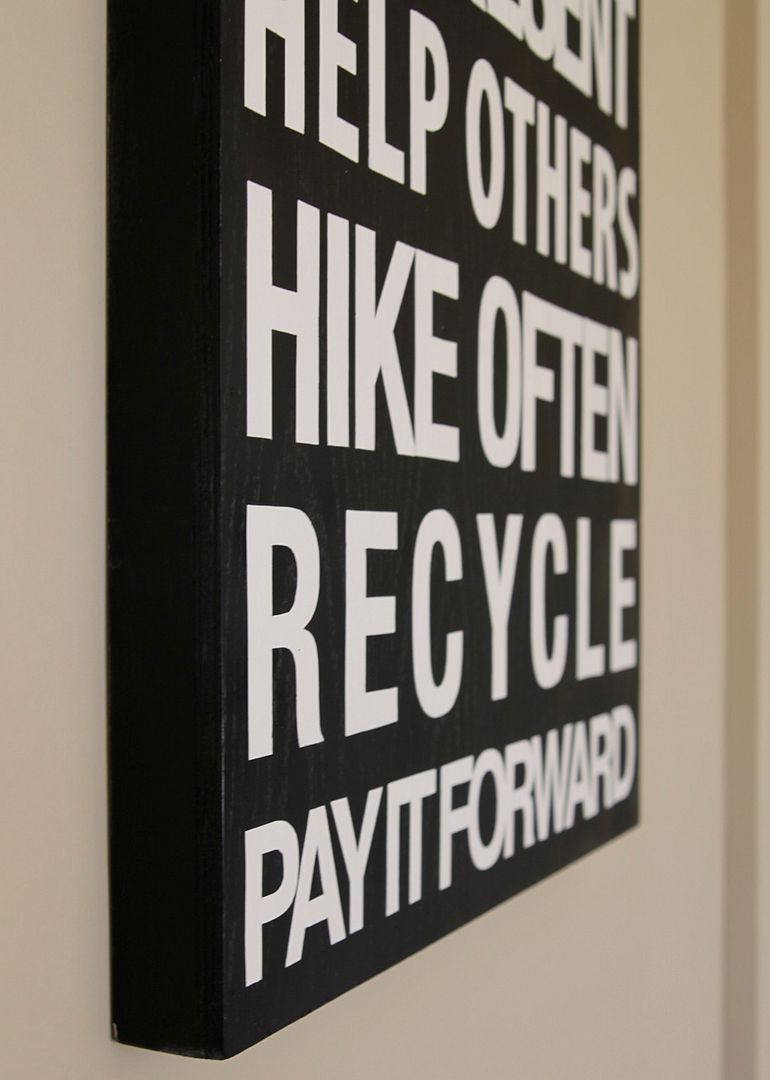
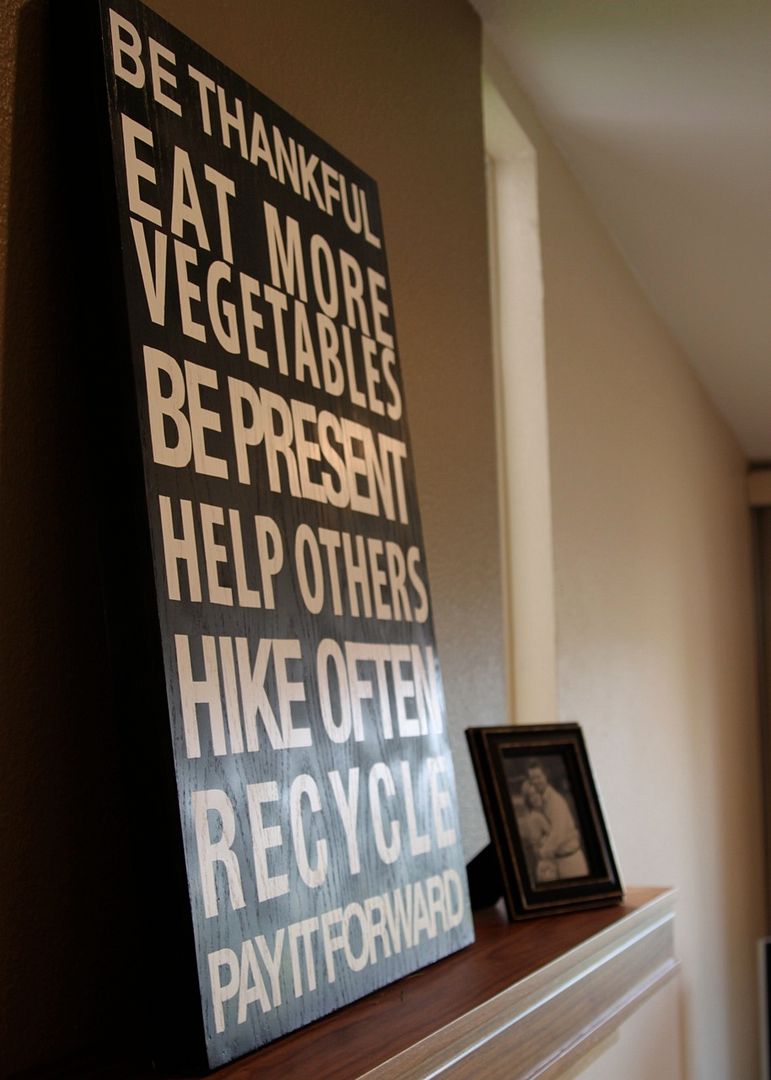
And it is bold enough to display on a mantle as the focus of a room:
Here is how I made it:
Step 1: I bought a ready cut 2' x 4' piece of wood from my hardware store and had them shorten it to 2' x 3.'

Step 2: I also bought long wood molding strips that were 1/2" wide and 1 1/2" deep. I started on one edge of my large flat piece of wood and marked where I would need to cut.

Step 3: I used a large mite saw to cut the corners at a 45 degree angle. If you don't have a mitre saw you can use a simple plastic mitre box and hand saw. There are only a few cuts so it won't take that long.

Step 4: I squeezed wood glue onto one of the long edges of the underside of my large board.....

.....and turned it over onto one of the long wood trim pieces and used hammer and nails to secure it.

I repeated this step, fitting each piece carefully into place until my piece looked like this:

Step 5: I used these little "nail-in" brackets from the hardware store as well to secure the corner pieces.

Step 6: I sprayed the entire wood piece with primer.

Step 7: I sanded it down to remove any significant wood grain. Then I sprayed the entire piece with white spray paint.

Step 8: I created this little template using Powerpoint to that I could space the letters for each line. Feel free to use this one or at least parts of it.
New Years
Step 9: I printed out my resolutions on regular sized paper. Then I took it to Fed Ex/Kinkos and used the large copier to enlarge it to the exact width I needed (cost about $4).

Step 10: I cut strips of vinyl contact paper the same width as the wording (the vinyl contact paper came in a 12" height so I could only fit 3 lines at a time on each strip).

Step 11: I used spray adhesive to attach the photo copy to the top of the contact paper. (Note: Do NOT apply to the paper side of the contact paper, you will be peeling this off later.)

Step 12: Then I trimmed around each line of words.

Step 13: I evenly spaced each set of words out along the board marking a "guide" line with pencil below each. Then I cut out each letter, peeled off the paper back and adhered to the board.

Step 14: I used a brayer to make sure each letter was adhered smoothly to the board.

Step 15: I sprayed the top and sides of the board with black spray paint. I did one coat at a time letting each dry well before applying the next coat.

Step 16: Once the board was completely coated and had time to dry.....

...I carefully peeled off each contact paper letter.

Step 17: I used a white paint pen to touch up any letters that needed it.

Step 18: Last step was to attach screws eyes (1/3 of the way down the back) and wire to hang!

No comments:
Post a Comment