
Speechless. Thank you so much for voting me through to the end. Thank you so much for supporting me. Thank you so much for creating me to inspire. I am truly blessed by all of you.
Now for the tutorial you all have been waiting for.
You will need:
You will need:
1 Yard of Solid Fabric For The Bottom
2 Yards of a Print Fabric For The Lining
1 Yard of a Print Fabric For The Top
1 Yard of Iron-on Interfacing
4 Yards of Iron on Vinyl
4 Yards of Double Sided Adhesive Stabilizer
1.5 Yards of Vinyl Table Cloth Material for The Bottom Inside
1 Package of Sew-on Velcro
1 Package of 1/4 inch Elastic
Coordinating Thread
1 Yard of Iron-on Interfacing
4 Yards of Iron on Vinyl
4 Yards of Double Sided Adhesive Stabilizer
1.5 Yards of Vinyl Table Cloth Material for The Bottom Inside
1 Package of Sew-on Velcro
1 Package of 1/4 inch Elastic
Coordinating Thread
Alright. Don't be too overwhelmed. It's allot of supplies. That is because the bag is Large, and sturdy. But These step by step directions are very detailed. And you can do it!!! Let's get started. If you aren't sure of what the supplies are listed above please visit this post, I have linked to what I used.
Grab your double sided adhesive stabilizer and cut out the following size pieces: (3) 16in X 14in, (2) 14in X 14in, (2) 14in X 3in, (1) 15in X 13in, and (1) 16in X 3in.
Grab your double sided adhesive stabilizer and cut out the following size pieces: (3) 16in X 14in, (2) 14in X 14in, (2) 14in X 3in, (1) 15in X 13in, and (1) 16in X 3in.

Then grab your Vinyl Table Cloth Material and cut the same sizes out as above. Place the coordinating size pieces of the the stabilizer and the table cloth together and head on over to your ironing board. Lay your stabilizer on your ironing board, then lay down the vinyl table cloth piece, and then cover with paper towels.

Put your iron on a medium heat setting and iron really well. If you iron is too hot, you can melt the vinyl table cloth material. You just want to smooth out the wrinkles and adhere it to the stabilizer. So Medium heat works perfect for this. Keep the ironing moving as well.

Repeat this process with all of the pieces you have cut so far.

Now grab your solid color fabric. Lay it out flat and put the pieces which you just ironed down on it, with one exception. You can set one piece measuring 16in X 14in to the side. Cut out each piece in the solid fabric. This will be used to make the bottom of the bag.

Take each of those colored pieces and cut out a coordinating piece of iron on vinyl. And then follow the directions on the vinyl to iron it to the right sides of the solid fabric. (It's easy to do, Remove the vinyl from the backing. Lay the vinyl on the fabric, flip over the backing and lay it on the vinyl. Iron on a medium setting for 8 seconds in each area, keep the iron moving. Flip over the fabric and iron for 4 seconds in each area. Once the fabric is cooled, remove the backing) Do this to all the pieces except the 16in X14in that you set aside in the previous step. Then take the piece that you have already ironed together, (the stabilizer and vinyl table cloth) and set it on your ironing board with the stabilizer side facing up. Lay the solid color fabric on it with the vinyl side up. Cover with a paper towel or the backing from the iron on vinyl and iron on medium heat just until the solid color adheres to the stabilizer, it happens really quick! You do not want to do this to the following pieces: (1) 15in X 13in, (2) 14in X 3in, and (1) 16in X 3 in. You will also have the piece you set aside before cutting the solid color fabric which is 16in X 14in.

Now take the 15in X 13 in piece that you set aside. Lay the piece down with the stabilizer and then the vinyl table cloth on top. Then lay down the solid color with the iron on vinyl down first. Sew around both the shorter sides and one longer side with 1/2 inch seam allowance. This makes a pocket looking piece.

Cut the two corners across. Do not cut the stitching.

Flip this piece inside out.

Then sew around the outside with a 1/4 inch seam allowance leaving the opening still open. You can then set this piece aside.
Now take the (2) 14in X 3 in pieces and stack them together the same way you did above. (With the stabilizer down and the vinyl table cloth up, and then the iron on vinyl down with the solid color last) Sew them together along one of the long edges using a 1/2 inch seam allowance.

Turn them right sides out and sew down the same edge with a 1/4 inch seam allowance.

Take the 16in X 3in piece and lay the stabilizer side down with the vinyl table cloth up. Then on the two edges lay the pieces that you created above with the stitching lines facing together with the iron on vinyl side up. Then take the solid fabric and lay it down next with the iron on vinyl facing down and the fabric side up. Pin along the top edge. Make sure to pin the two strips to the outer edges.

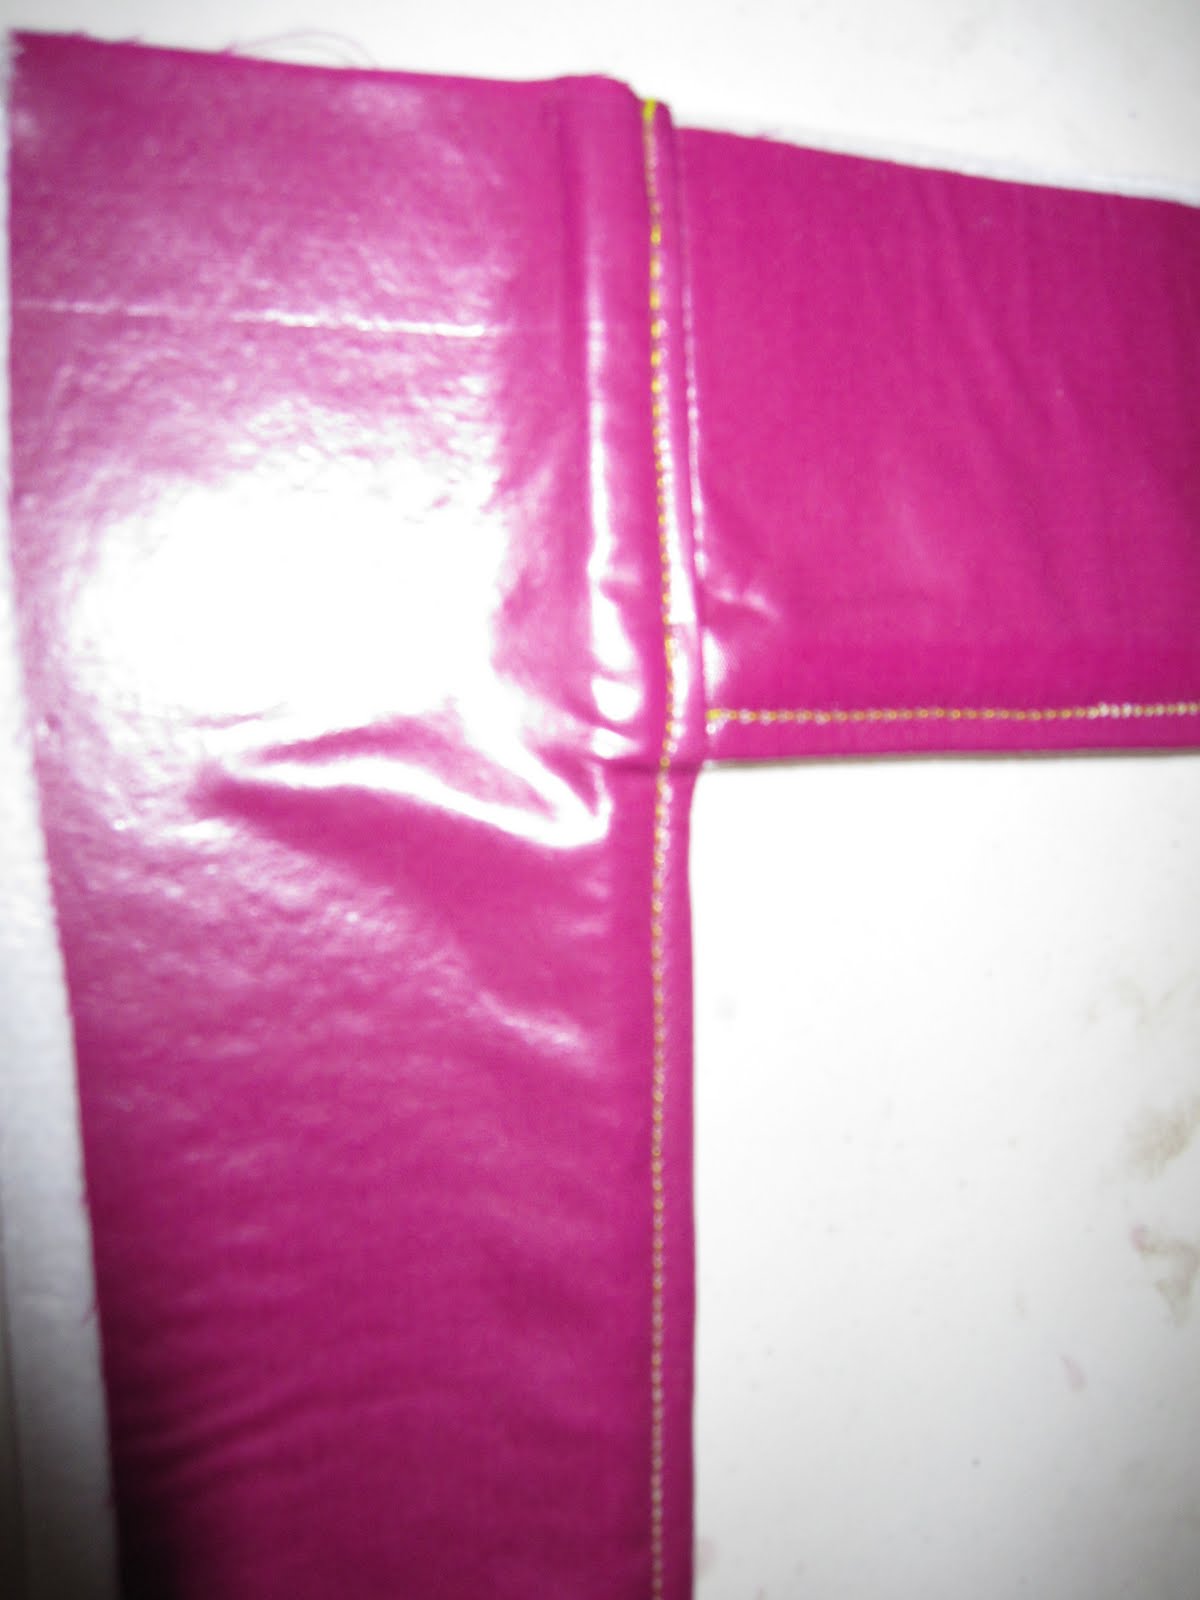
Just in case I have confused you. If I lift up the edge of this this is what it will look like.

Sew along this pinned edge with a 1/2 inch seam allowance. Then flip this piece up so the iron on vinyl side is facing out and the vinyl table cloth side is facing out the back. Sew a 1/4 inch seam allowance down the edge.
Lay this U-shape piece that you have just created onto a flat surface. Lay the previous pocket piece that you created on top of it. You want it to be centered between the two sides and then the same amount from the top. The two sides will be longer than the main piece. Place one pin on the bottom of the pocket piece and the edge of the sides to hold in place.

Take your package of Velcro and separate the sides. Lay the hard side of the Velcro, not the soft fuzzy side, down on the edge of the flap piece, on the vinyl table cloth side. Pin this in place. I set it down on the two edges first and then centered the remaining piece on the top. Take this to your sewing machine and sew a box around the edge of the Velcro.

Now lay the soft fuzzy side of the Velcro down along the edges of the U-shape where the flap lays when you fold it down on the pins like a hinge. I am not sure why I missed taking a picture of this step but sew around the edge of the Velcro just like you did above. Then lay the flap down with the Velcro attached. You can then remove the two pins.

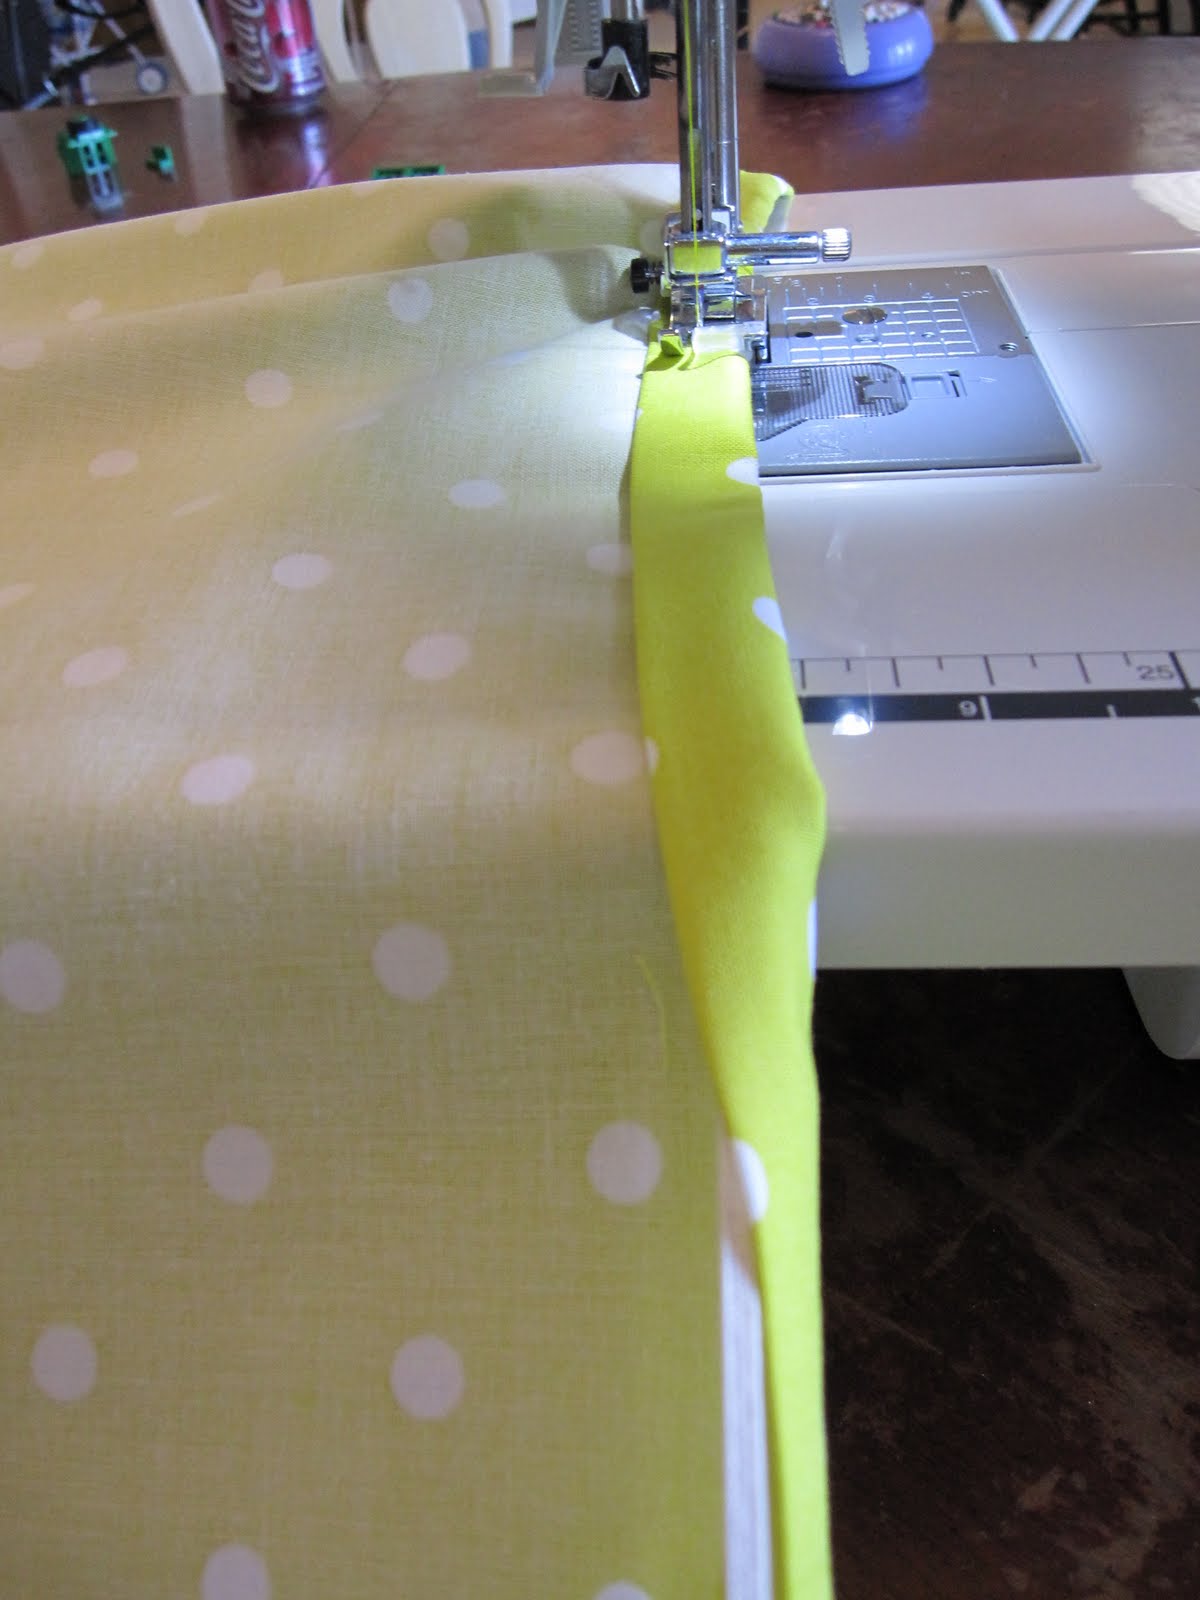
Now grab your (2) yards of print fabric for the lining. Cut the following pieces: (2) 22in X 10in, (3) 8in X 6in, (3) 6in X 5in, (4) 13in X 13in, (6) 9in X 13in, and (2) 41in X 4in. Take the (2) 22in X 10in pieces. Iron along the top edge 1/4 inch down.

Then flip it down and iron 1/2 inch. Do this to both of the pieces.

Head over to your sewing machine. Cut two pieces of elastic to be 13 inches. Take one of them and put it under this fold you created. Sew the end of the elastic to the edge of the fabric. Then place your piece under your sewing machine. You are going to sew with a 1/4 inch seam allowance. For my machine, that is the edge of the presser foot. Start sewing and back stitch a little.

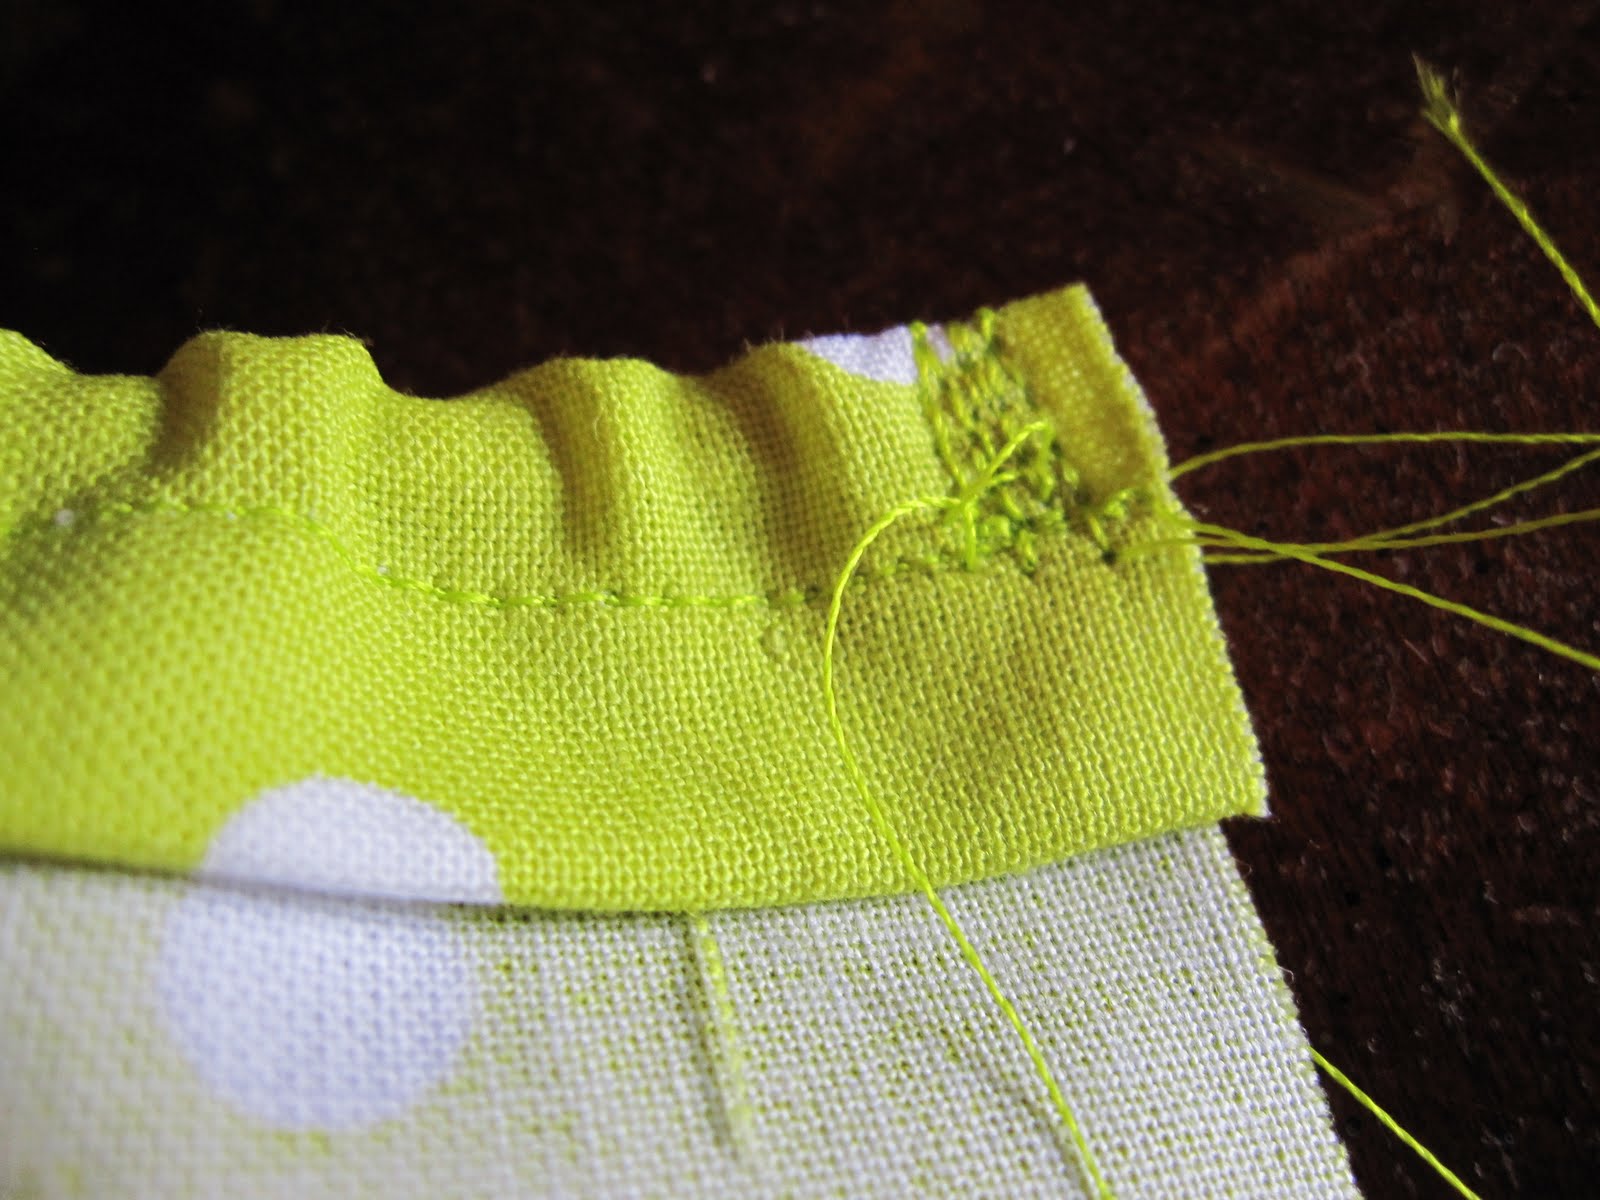
As you sew keep the elastic straight ahead. This is so much easier then threading it through the casing with a safety pin.
When you get to the end keep pulling the elastic with your finger. Don't let go of it. Sew to the end and back stitch. Take the fabric out from under your machine as you regularly do. Keep the elastic in your hand.

Then stitch the edge of the elastic to the edge of the fabric. Do this two both pieces. Sew a basting stitch on the other long edge of the pieces. We will gather this edge in a later step.
Take these two pieces and take the (2) 14in X 14in pieces of solid color. Pin the sides of the lining fabric to the sides of the solid fabric starting at the bottom edge. Pin on at both sides.

Now is when you will gather the bottom. Gather it so it fits across the piece. Pin in place.

Take this to your sewing machine and sew along the outer edges. Do this with both pieces.

Then five inches in from either side sew a line down the lining piece. This will create three separate sections for water bottles.

Now take the U-shape piece. (Your flap will be attached. I removed mine so you can see what is under it) Pin one of the edges to one of the pocket pieces edge. You want the top of the pocket to be facing the same direction as the top of the flap on the U. Sew along the edge with 1/2 inch seam allowance. Then sew along the edge with a 1/4 inch seam allowance. This just adds extra stability for the bottom of the bag.

Fold the pocket piece over and sew along the edge of the seam on the pocket side of the piece with a 1/4 inch seam allowance.

Repeat this process with the other pocket flap on the the other side of the U piece.

It will look like this once it is completed and laying flat. Again, you will have the flap piece on yours.

Here is what yours will look like.

Now take the (3) 8in X 6in pieces. Iron the edges under all 1/4 inch.

Then 1/4 inch more.

Sew along the edges of this piece.

Fold each edge in 1/2 inch to create a pleat on each side. Ignore the pink color behind. I just set it down for the picture. This piece will now measure 4 inches across.

This is what it will look like from the back. Do this to all three pieces.

Take these three pieces and pin them to (1) 16in X 14in solid piece. You will want them 3 inches up from the bottom and evenly spaces across the width of the piece. 1 inch on each sides, and 1 inch inbetween each piece.

Sew down the long edges and across the bottom of the short edge. Leave the tops open and pinned.

Then take the (3) 6in X 5in pieces and fold them in half right sides together. Sew down the sides.

Turn them right sides out.

Tuck the unsewn edges in 1/4 inch.

Sew around all four edges. Do this to all three pieces.

Place them 1 inch above the top edge of the pocket. Make a similar pleat to match the pocket. Sew along the top edge. Do not sew on any other edge. Just the top edge of the piece. This will be a flap to cover the top of the pocket when it is filled.
Take this piece and sew it to the edge of the other three that you have attached already. Make sure the pockets face the same direction as the elastic pockets and the flap on the U. Once it is folded right sides sew 1/4 inch seam allowance on the piece with the elastic pocket, just as you did previously.

Sew the remaining two edges together. Then sew the same 1/4 inch seam allowance along the edge of the piece with the elastic pockets.

Take the remaining 16in X 14in piece that had the solid color attached. Pin this to the bottom edges of the bags with the vinyl table cloth side facing up and the vinyl table cloth sides facing out. I pinned two opposite edges first.

Then pinned the remaining two.

Sew with a 1/2 inch seam allowance along the edge of the bag. Cut of the two longer pieces.

Turn right sides out.

The inside of your bag will look like this:


Take the 16in X 14in piece you set aside clear at the beginning. Pin it to the edges with the vinyl table cloth side down and the stabilizer side up. Sew along the outside edge with a 1/4 inch seam allowance.

Now take your 1 yard of print fabric and cut the following pieces: (4) 14in X 7.5in, (2) 15in X 16in, 2 (15in X 14in), and (1) 40in X 7in. Take one 15in X 16in and one 15 in X 14in and pin the 15 inch sides together. Sew down the edge using a 1/2 inch seam allowance. Do this to the two other pieces that are the same size. Then pin the two pieces together to create a box shape.

Slide this box shape over the bottom of the bag with right sides together. Pull it all the way down so the edges meet with the edge with the stabilizer piece.

Sew along the edge with a 1/2 inch seam allowance.

Take the (4) 14in X 7.5in pieces and iron one long edge under 1/4in.

Then fold it down 1/2 inch and iron.

Repeat with all 4 pieces and then add elastic and sew like you did with the previous elastic pockets above.

Baste the other side of the fabric edge.

Take these 4 pieces and take (2) 9in X 13in and (2) 13in X 13in lining pieces that you previously cut. Line these 4 pieces with the regular interfacing. Line up the sides of the lining and the elastic pocket pieces and pin. Then gather the bottom edge of the pocket so it fits the bottom edge of the lining piece. Sew around the outside edge the same way you did on the previous elastic pocket you created for the waterbottles. Then sew up the middle of each pocket to seperate it into two pockets. The two pockets on the side pieces will be more gathered than the two pieces on the front and back lining pieces which are slightly larger.

You will then take these 4 pieces and pin them in a rectangle with the pockets all facing up, (Ignore the piece I folded down, I didn't end up making it like that), with right sides together.

Sew down the sides using a 1/2 inch seam allowance.

Take another 9in X 13in piece and sew onto the bottom of the rectangle using a 1/2 inch seam allowance. Do this the same way we did to the bottom of the bag above.

Now take (2) 13in X 13in and (3) 9in X 13in pieces and iron on iron on vinyl to the right sides. Then sew these pieces into a rectangle like above. Line up the 13 inch pieces on the sides. Then sew on the remaining 9in X 13in piece onto the bottom of the rectangle to create a box like you did above, only this piece has no pockets inside of it. Slide the two of these boxes into the top of the bag.

Take the (2) 41in X 4in pieces and fold under 1/4 inch and iron, then 1/2 inch. Sew along the very edge.

String a ribbon through it. I used red so you could eaily see it. However I did switch it out later for white. You want your ribbon to be 10 inches long. You will do this to both pieces.

Tie the ribbon ends into a knot, and then tie them together so they do not come out.

Line up the edges of the fabric right sides together and sew along the very edge. Do this to both pieces. Only sew until you reach the casing and then stop. Do not sew any further than the casing or up onto the ribbon.

With the boxes inside the bags fold the top of the lining boxes down about 1/2 inch. Pin them down and then you can pull them out of the bag. Pin the edge of the draw string piece to the top of the folded edge. You want the right side of the drawstring bag up, but the wrong sides of the box part facing out.

Repeat this with both of the boxes. Then sew along the raw edge of the drawstring pieces with a 1/4 inch seam allowance.

Place one of the boxes back in the bag. Line up the seams to the outer piece with the seams to this box piece. Fold the top of the outer edge down 1 inch and pin it to the edge of the box. You want the box to sit down 1/2 inch further than the outer edge of the bag. Leave the inside side of the box unpinned to the outer piece of the bag.

Place in the second box. Pin it to the outside the same way you did to the other box. Place them so both of the drawsting openings are inward. You can see the red ribbon in the picture below. Pin the inside edges of the boxes together.


Head over to your sewing machine. Start in the center of the two boxes. Sew around the edge with a 1/2 inch seam allowance. You will be stitching with the machine on the outside of the bag and the inside. So slide your machine into the drawstring part of your bag. You do not want to be stitching through two layers or you will stitch your bag closed. The bobbin thread will be seen on the inner side of the drawstring piece. I hope I haven't confused you. Sew all the way around to the other side of this box. Then you will have to stop and take the bag off of your machine and insert it into the other drawsting box. Then you can start going the other direction to finish sewing the outside of the bag to the two boxes.


The insides of the two boxes will still be just pinned together. You have not sewed them yet. Now you can sew them together by sliding the drawstring piece under your presser foot and the outer edge of the bag pressed to the sides of your machine so you do not sew them. Sew from one edge of the outer bag to the other along the folded edge of the drawstring piece.


The inside will look like this, You can see the sewn line just above the fold on the actual drawstring piece.


The inside boxes should now be complety sewn into the outer shell of the bag. They should also be sewn together in the inside edge.


You can now pull the draw strings tight and tie them together in the center.

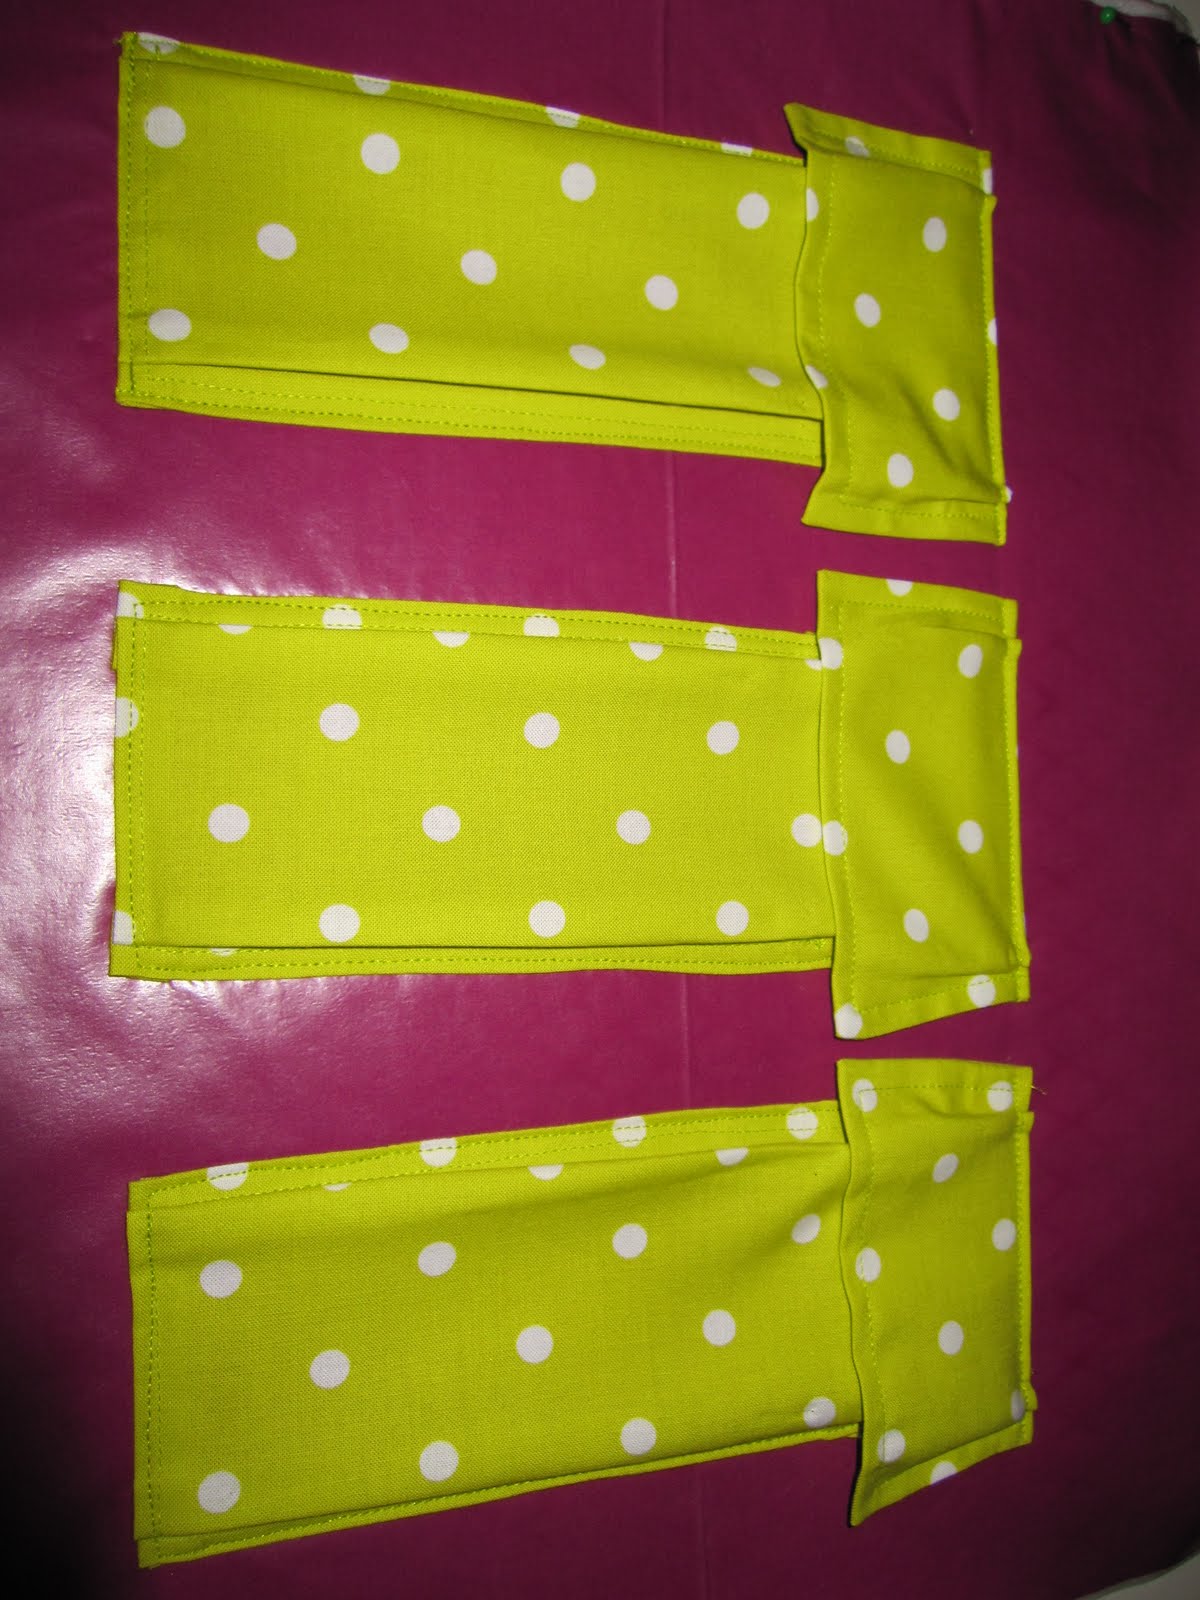
Now take the (2) 41in X 4in piece and sew along the two long edges right sides together.

Flip it inside out. Sew along the other edges with a 1/4 inch seam allowance.

Fold one of the raw edges up 1/2 inch. Pin to the top sides of the bottom part of the bag on the sides with the elastic pockets in the center. Do this to the other end and the other side of the bag as well.

Hand sew around the edges. You can try to maneuver this through your machine if you like. I didn't want to chance breaking a needle. It was really easy to just hand sew.
Now take the (2) 41in X 4in piece and sew along the two long edges right sides together.
Flip it inside out. Sew along the other edges with a 1/4 inch seam allowance.
Fold one of the raw edges up 1/2 inch. Pin to the top sides of the bottom part of the bag on the sides with the elastic pockets in the center. Do this to the other end and the other side of the bag as well.
Hand sew around the edges. You can try to maneuver this through your machine if you like. I didn't want to chance breaking a needle. It was really easy to just hand sew.

And you're finished!

I would LOVE to see all of your swimming bags! Please stop by my blog at ShannonMakesStuff, become a follwer and link your perfect swim bag to my tutorial post!
And for those of you like me and my mother, who don't haul around a change of clothes and extra supplies, and are the "mean" mom and make their kids come home wrapped up in their towels, I am creating a smaller version of this bag! So head on over and watch for it to be posted as well!
Thanks again to everyone for the fabulous time I've had in this competition. To the gals I've competed against, and to the voters, and to Missy! It's been an honor.
1 comment:
Oh, I'm so excited!!!! LOVE, LOVE this bag! Thank you for sharing it!
congratulations!
amy
Post a Comment