
--------------------------------------------------------------------

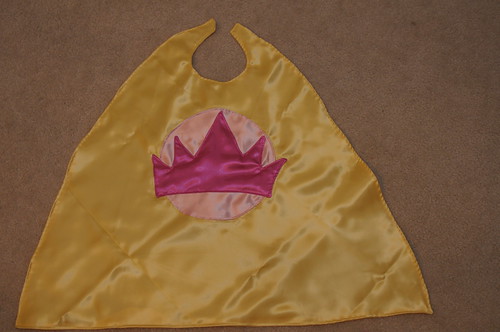
Here is the tutorial you asked for: How to make a Super Hero Cape
Last night I started working on Lily’s. Overall, these capes take just a bit less than the length of the average football game. How’s that for precise?
What you need:
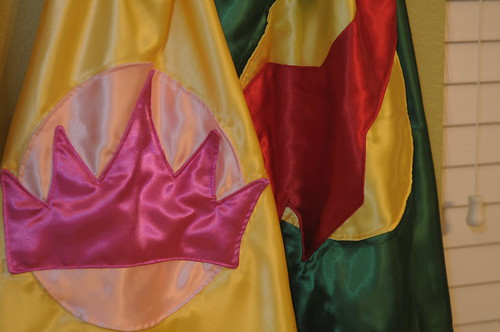
3 Colors of Satin (* indicates which color I’m referring to on the images below)
- Primary Color: 2 yards (*yellow)
- Circle/Accent Color: 1/3 of a yard – 1/2 yard depending on how big the kid is (*lt pink)
- Decoration Color: 1/3 of a yard (*raspberry)
3 colors of thread to match satin color
Sharp scissors
Lots of pins
sewing machine
washable ink fabric marker
Measuring tape
Spare Fabric for design template (felt works best!)
Directions:
Measure from the nape of your childs neck, down to where you want the cape to end. Start with something around 20 (for small toddlers) to 22 (for bigger toddlers) inches and adjust as needed. This will be called distance A. (For Reference: Lily’s was 19.5″)
Measure around your childs neck from the throat, around the back, to the throat again. This is so you know how big to make the neck opening.
Lay out your primary color satin, right sides together. Place a pin 2.5″ from the bottom of the fabric panels.
Measure up distance A. Place another pin.
Take your measuring tape and place the 15″ tick on the bottom pin in your fabric. Mark at the 1″ tick with a pin, and the 30″ tick with a pin. This give you an approximate width for your cape. You can make it smaller (for smaller kids) or wider (for bigger kids) as necessary. (Lily’s was 29.5″)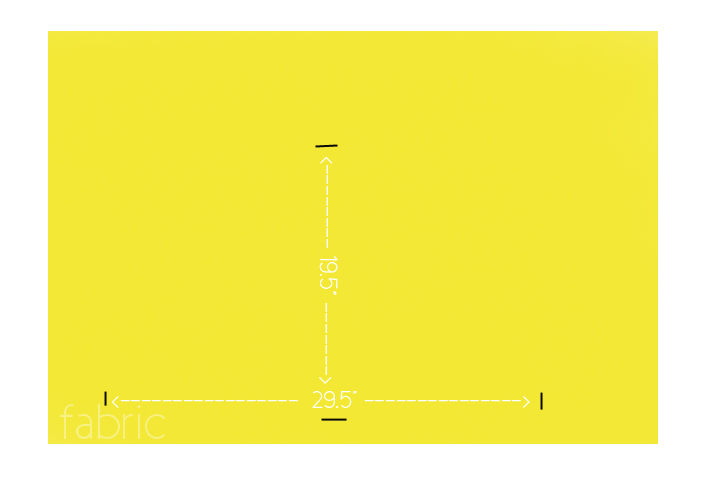
Measure up from top pin, 5-6″ (depending on how large you want the neck opening to be. Mark with pin.
From halfway up that small section, measure across the same distance and pin on each side.
Sketch a circle with your fabric marker. This is the neck hole opening.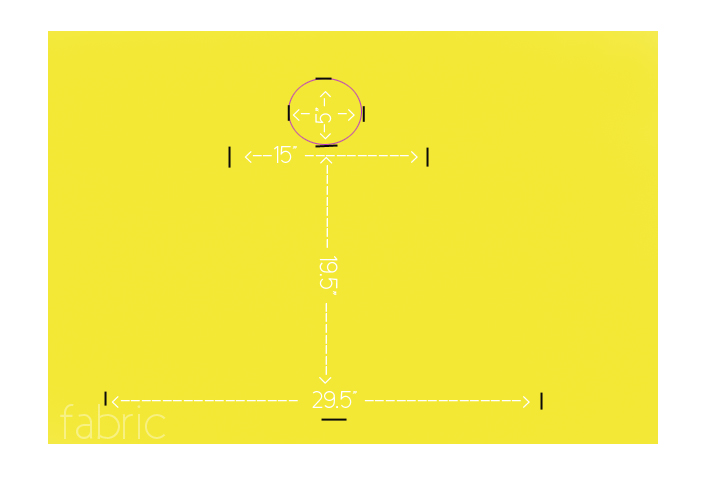
At “nape of neck” measure across 15-16.5″ inches based on cape size. mark with pin.
Measure up 1″ from very top pin. mark with pin.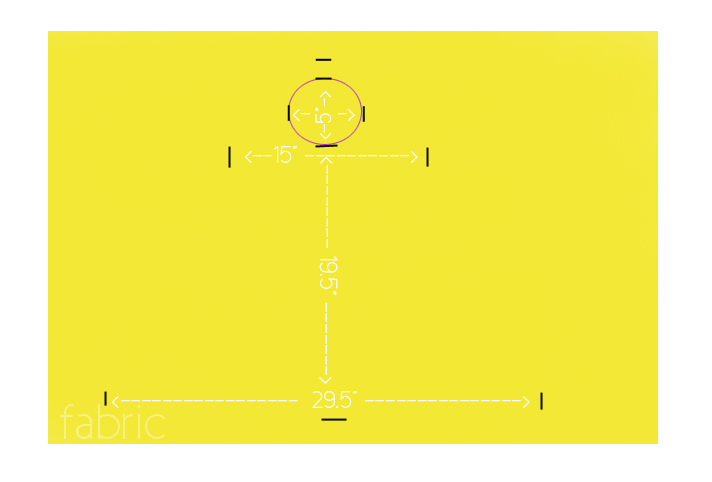
Using pins placed, sketch out the overall shape on the cape using your marker.
Move pins to inside the lines to hold 2 panels of satin together. Stitch along sketched line, except for a opening at the bottom, big enough for turning. (red area shown)
Now on to the real photos ![]()
Now that you have your cape edges sewn, go ahead and trim off the excess fabric, leaving 1/4″ seam allowance.
Turn
Topstitch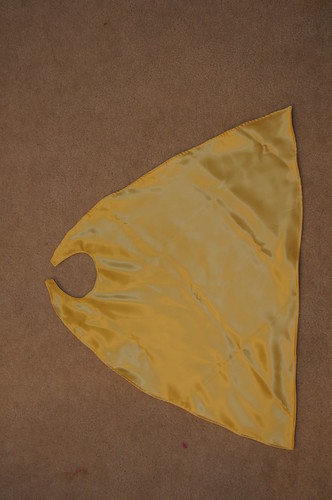
Now for the design.
For the circle, decide how big you want it. Brendan’s was 10″ exactly. Lily’s was about 9.25″ I used a cake pan for Brendan’s ![]()

Outline the cake pan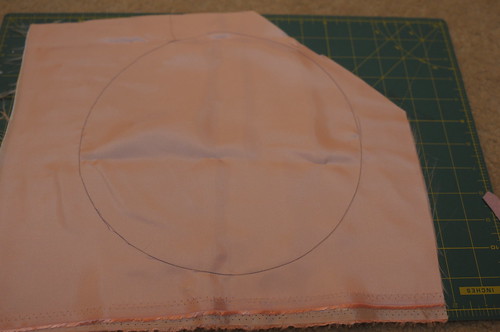
Sew, leaving an area for turning
Turn
Set aside.
Using some scrap fabric (I like felt, it’s sturdy) sketch out the design you want for your cape. We had to do this 2x with Brendans, so I made 2 designs for Lily’s to see which I liked better.
Cut out the shapes and place them on your cape to be sure you like the shape/scale.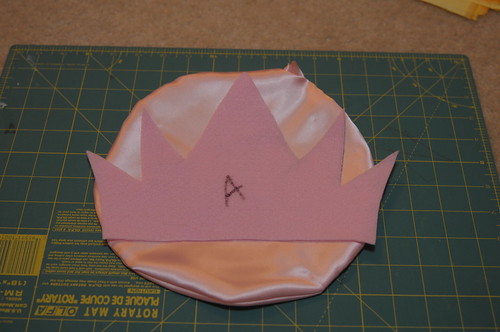
Place 2 pieces of design color, right sides together. Place template over fabric and outline
Stitch, leaving an area open for turning
Cut out and trim on curves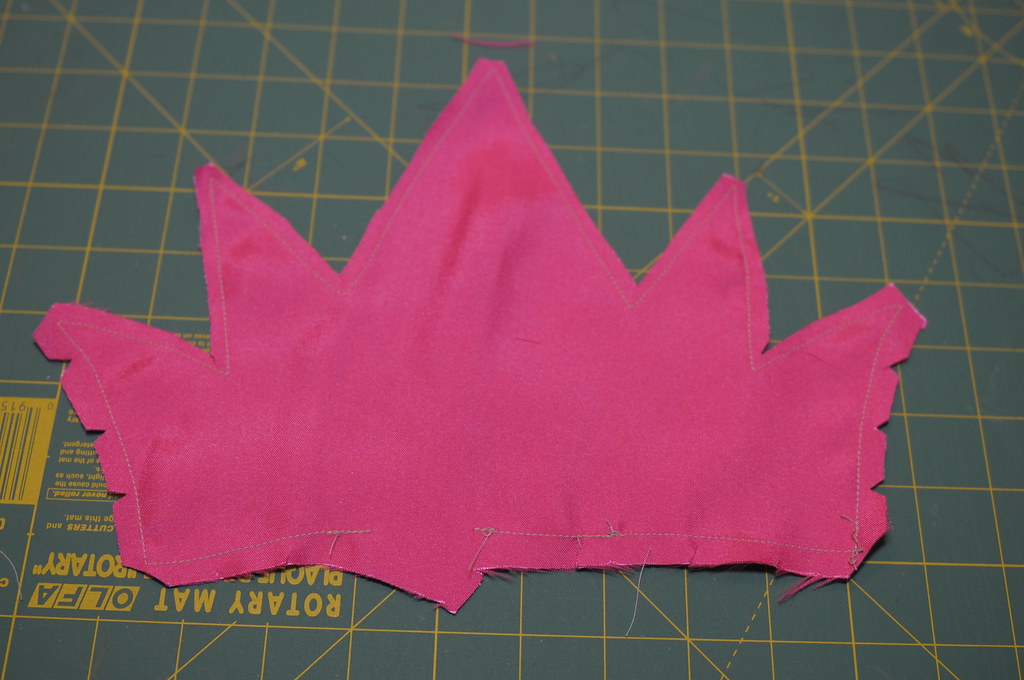
Turn
Place both smaller pieces on cape to check for placement
Pin circle down
*Load machine with accent color on your spool and primary color on your bobbin. (ie: Light pink on top, yellow on bottom)
Sew circle down
Pin design down
*Load machine with design color on your spool and primary color on your bobbin. (ie: raspberry on top, yellow on bottom)
Stitch the design down
Option: Using primary colored thread (yellow), do a decorative stitch all the way around the design. I did this on both and it adds a nice touch.
The reason for the primary color on the bobbin is because it will blend in with the main panel, and not show very much on the underside:
Add velcro to neck tabs
Wrap it up and place it under the tree ![]()

If you love this tutorial, please take a moment to utilize the “share” button to post it on facebook, twitter, or whatever social site you use ![]()
If you USE this tutorial, please send me a photo when you are done (or a link to your blog post about it). I’d love to share it on the site ![]()
Thank you so much!
No comments:
Post a Comment