
Shilo @ "Toad"ly Crafts
Lynette @ Get Your Craft On
Chris @ Pickup Some Creativity
Kelly @ All Things Made by Kelly
Cheryl @ A Pretty Cool Life
Marjorie @ Living With Three Moonbabies
Katie @ Blue Eyed Freckle
Eva @ Handmade Beginnings
Charlene @ eWillow
Becky @ Beckymae's Journey
Jess @ Running With Scissors
Amber @ The Neatery
Amy @ Vintage Fern
Bobbie @ I am Only One Woman
Sara @ Creative Jewish Mom
Holly @ Bijou Lovely
Fawnda @ Fireflies and Jellybeans
Ann @ DecoMOD Studio
Rachel @ Southern KnitWit
Korinne @ Crafterella
I know everything is great, but look carefully at all of them before you choose the one you think is the best. Good luck! Voting is open until Friday @ 9 pm MST. And since we're choosing 10, there will be no tutorials from this week.
Also, if you're interested in sponsoring a weekly prize or the contest as a whole email me!
---------------------------------------------
Craft #1 - Mod Flower Door Curtain
In order to photograph this "door curtain" I actually had to close the door, but try to imagine it with the door open, leading into a cute girl's bedroom or playroom. There are lots of colorful paper flowers, hearts, and ladybugs hanging from the top of the door frame to the floor (well, almost to the floor.)
I covered a 1/4" wooden dowel with decorative paper, cut the dowel to fit the door frame, and added rubber stoppers to each end to hold the dowel in the frame. The rubber stoppers give the dowel just the right amount of tension for it to stay in place. You could also use a tension curtain rod, but I liked the idea of covering the dowel in paper to match the color motif of the flowers.
I tied the decorative pieces to the main strings with colorful ribbon. They dangle and dazzle and give this door curtain just the right pizzaz to finish off and add a little bit of privacy to a girl's special place.

Craft #2 - Snuggaroo
A pillow that you can snuggle with, play with, and best of all, it has a pouch on the back to put all your favorite things in. Oh, and a little handle on top to help you carry it around!

 It was made using only a thrifted fleece jacket, felt scraps and thread.
The SnuggaRoo is a great way to take something old and make it new!
 These would be great to take on road trips, sleepovers or even just to snuggle with at nap time.
Craft #3 - DS Carrying/Storage Case
“Mom where’s my charger?”
“I know that’s my stylus, not his!”
“I can’t find my Pokemon game!”
Do you hear this to often! I know I do. I knew something had to be done. But at $40+ for a nice carrying case at the store, affording one was going to be hard never mind one for each of the kids (and my hubby!).

Problem solved!
No more lost chargers, no more whinny road trips and no more arguing on
what belongs to who!

Inside I used felt to create custom sized storage pockets for the various components, games and manuals.

Now its just a matter of grabbing and go….gaming on the go….I may never see my kiddos…or hubby again!
Craft #4 - Sophisticated Scrap Bracelet
 I love to sew, but with sewing comes a lot of scraps. I just can't seem to throw away those small pieces of fabric and elastic. I made this bracelet with the rest of the waistband elastic from a skirt that I was making.
 I just love how sophisticated and pretty it is. Don't you think?
 I made these fun bracelets out of stretch elastic, satin ribbon, beads, and buttons.
Craft #5 - Memo Board


Craft #6 - Matchbox Organizer
Is your home overflowing with matchbox cars? After Christmas mine was! So, I wanted to make an organizer that would keep the cars accessible, and add some style to the boys' room. The car applique was inspired by the pocket fabric. I used freezer paper stencils for the wording, and to enhance to car applique. I made piping and sewed it around the edge to set off the silhouette of the hanger. There are seven pockets per row, so this particular length holds 42 cars. The back has an envelope closure, so that I can remove the hanger if I need to wash the garage. Best part, it hangs in the closet, or on a hook, and can be put away when not in use.
Craft #7 - King of New York Suit

I used 1 yard of the charcoal pinstripe fabric to make the trousers, vest, and hat. The white shirt was purchased. I used a pair of pants as the pattern for the trousers, and a boy's t-shirt as the pattern for the vest. The trousers have pockets and a faux zipper/ tab. To make it easier, these pants are elastic waist in the back to slip on and off so you don't have to deal with snaps and zippers on wiggly little guys.


Craft #8 - Cling Anywhere Clings
So what if you can make a cling to be any design you want and put them wherever you want.


Using glow-in-the-dark paint you can make spooky eyes that glow. These would look great on your front door at Halloween.

You can even put your monogram on your car (or wherever you want really) in what ever color scheme you want.
I have made snowflakes in the winter and I even made a logo of my DH favorite sports
Craft #9 -Gingham Placemats

I just love the cheerfulness of gingham.


Craft #10 - Spring Garden Necklace

Are you like me with a whole bunch of plain shirts in your closet? Do you need something to spice them up without having to actually sew something directly on each of them? That is what the "Spring Garden" necklace is for!

I made it out of fabrics and felts so that it lays on your t-shirt in a way that makes it look like it is part of the shirt.

Of course it could be made out of more subdued hues, but I thought it would be fun and spring-y to use a combination of nautical and floral colors and patterns. The possibilities are endless!
Craft #11 - Dessert Plates
. LOVE . forever . LOVE YOU . it's true .
4 personalized dessert dishes
Make these for someone special . to treasure . forever
 I don't know if it's happened at your house, but my fridge is starting to fill up with bridal shower invites. Yes ladies, wedding season is on the horizon here is a fun and personalized gift to give. Maybe you could monogram a few for your little sister's wedding or baby shower! These simple, white plates were purchased for much less than a dollar a piece. So with a million gift giving events coming up, you won't break the bank.
We will be making these for our Grandmothers for Mother's Day.
Personalize these with Mom's favorite phrase or favorite flower!

Craft #12 - Diaper Clutch
 Imagine having to carry that heavy diaper bag every where you go, now all you need is this simple clutch. Designed for every mom in a hurry. Will fit in most large purses. It's a diaper holder, changing pad, mini pillow (your extra diapers are nice place to rest that beautiful baby's head on), easy velcro close, washable, fun

Craft #13 - Play Kitchen
As I brainstormed ideas for my daughters birthday present this year, I knew a play kitchen would be a big hit. However, I just wasn't willing to pay so much money for a hunk of plastic. So, after some searching and brainstorming, I decided to jump in on the re-fashioning trend and turn our old


Craft #14 - Birthday Crown
 A friend's daughter is having her second birthday soon, so a crown was in order. My crafting preferences tend to involve sewing, embroidery, crocheting or paper. This shows two of those...sewing and embroidery. A little felt, a scrap of fabric & elastic, and thread. Let the celebrations begin.
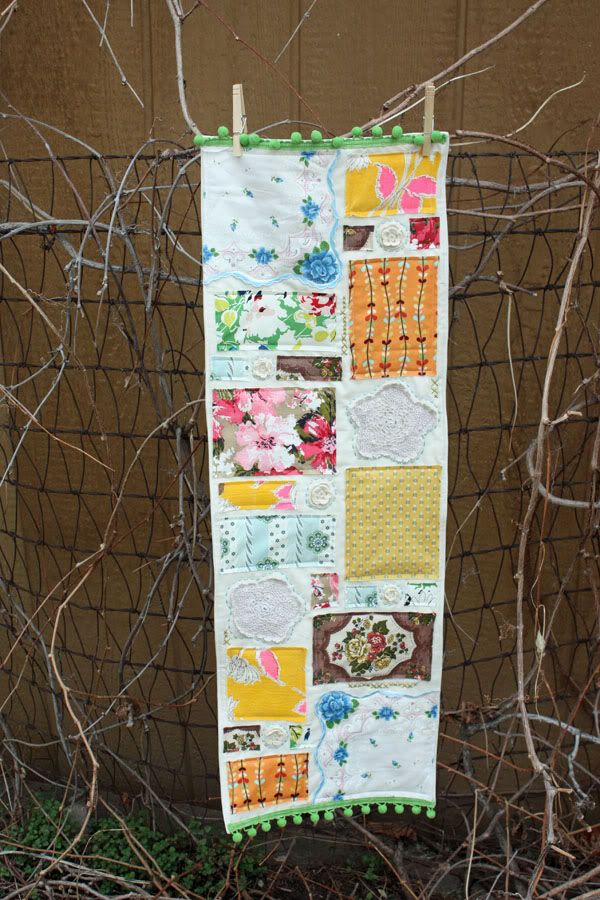
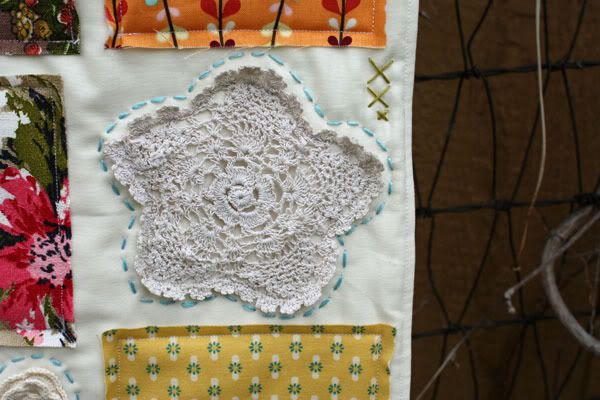
Craft #15 - Scrappy Happy Table Runner
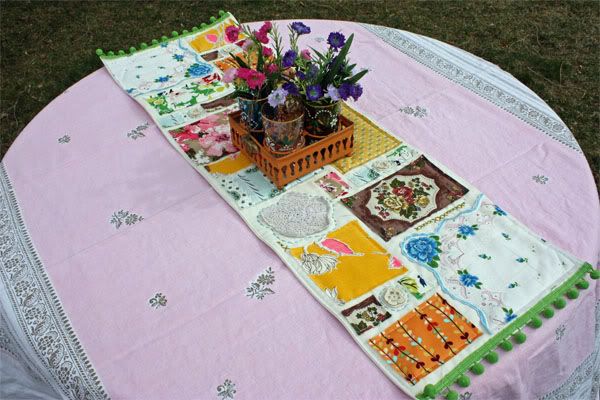
I don't know about you, but springtime makes me think of tea parties. Tea Parties make me think of decorations and a fun scrappy table runner is just the thing to help decorate your party or just to add some happy to your everyday!
Craft #16 -Birthday Throne
What can you do with some pom-poms, felt yardage, and sequin trim, that can create happy memories for your family for years to come? Wouldn't you like to have some ready-made decorations on hand, to honor birthdays or other important milestones? Have you ever had a guest who suddenly announces that today is her birthday? Wouldn't it be great to whip out some decorations at a moment's notice? So here's the answer to all of these questions: a simple felt slip cover that can turn a regular arm chair into a festive birthday throne!
No tricky calculations necessary, just make a simple pattern by tracing the shape of the back of the chair, and then cut out two identical pieces, which are joined at the top only. You can make some ties on the sides if necessary, and the seat piece needn't be more than a simple square that you can also attach with ties or tuck in, depending on the type of chair you'll be using. As for the pom-poms, I whipped these up with my new pom-pom maker that works like a dream!
So hang a fabric backdrop (even over a door, like I did here!), and some felt garlands or balloons, get out your slip cover, and let the party begin!
And by the way, in keeping with the theme, a simple pom-pom as a present topper is just as cute as can be! Wouldn't you like to see more cute crafting projects like this one! Vote for me so I can show you what I've got up my sleeve for the next round!
Craft #17 - Laptop Messenger Bag


Craft #18 - Travel First-Aid Kit
Maybe it is the Girl Scout in me (always be prepared!), or perhaps it is because I have a toddler, or it is possibly because I am a bit clumsy. Whatever the reason, I chose to make a travel first aid kit - something that will fit in my purse, and also be stylish at the same time (at least I can look good after I fall!).
I made a pocket for bandages and cleansing wipes, elastic straps to hold the antiseptic and Children's Tylenol, and a zipper pocket for suckers (nothing heals a boo-boo faster than a sucker!).

Everything is all packed up in it's place.


Craft #19 - Tote Bag
 This personalized tote bag would be the perfect gift for a mom or grandma! These silhouettes are easy to cut and give a sophisticated look. I bought this roomy tote bag from Hobby Lobby with a coupon, so this project is cheap too! The silhouettes are easy to attach by ironing on. Some names underneath the silhouettes would be cute as well!!! This would be so easy to customize for anyone on your gift list.
Craft #20 -Recycled Magnet Board

What better way to display art work by you and yours? Not to mention, display it on a magnetic board made from items otherwise recycled! The best part is it's totally customizable to suit your needs and to match your room decor. I made the A.R.T. letter magnetic boards for my child's playroom. And below I painted and decoupaged a little magnetic flower board to hang above my sewing machine... a place to put little bits of inspiration.

Have you guessed yet what I used to make these boards?
None other than metal lids from concentrate juice cans!

I used to get made fun of for collecting these things, but I knew they'd come in handy someday!
Craft #21 - Traveling Sketchbook Case
It is amazing to me how much some “wasted” time adds up through the day, waiting to pick up kids, waiting for appointments, etc. I have decided to make sure that I have crafty things available to do when these moments of time pop up and so I made this traveling sketchbook case.

It has everything I need to work on new ideas, take note, and gather random bits of information and it’s made from eco-friendly fused plastic.

The outside is made from scraps of fused plastic from other projects that have been zigzagged together to make a large piece of fabric. Inside it is lined with soft fleece. Two custom made shrinky plastic clasps on elastic keep the case closed and allow for added thickness.

No more wasted time for me, I’ll be sketching away my waiting time!
43 comments:
number 10!!!!!!!!!!!!!!
oh my heavens.. i love those boy suspenders...I've never even thought of making suspenders before!
I just checked all of your cute creative blogs out! Good Luck to you all!
Most definitely #5!
wow competition is fierce! good luck to everyone. Its fun competing against so many friends. Thanks again for letting me be a part of it
#13 Play Kitchen! For sure! The color, the fabulous sink, the curtains, the stove top....the whole thing is just darling!
I am in love with the Hot Wheels holder! Genius!
#5!!!
#9!
#15, is great. It was hard to choose.
#6, the Matchbox organizer...my twin boys would LOVE it!
#13 - Great job!
Number 6 is really a cute idea. I love the saying!!
Wow such creative people!! I am impressed with all the idea, but fell in love with the plates #11. So cute and simple!!
#13 for me.
I loved #10! In fact I want to know where I can buy one!
#9 - what a great way to spruce up a tea party
I am in love with #17! I want one for myself!
wow - those are all so awesome!! it was really hard to choose
I really like them all and I think that it is so hard to choose just one! I have to say that I thought that #20 was pretty ingenious recycling and reusing those concentrated juice tops!
Number #3
#3
That was SO hard! So many of the projects are just fabulous. I finally chose 13, but it was a close running.
#3 it is the one I would use the most.
#3! I have 3 boys so it is right up my alley!
#11 - Dessert Plates! Great idea for all those upcoming showers and weddings!
They really all are fabulous, and it was hard to choose. however, #13 gets my vote.
I am voting for #6!!
Love #6!
#1 I LOVE IT!!
#13 Way Cool it has been years since I have seen a kitchen set like this.I used to play on one in pre school so cool great job and creative....all the way
#11 just love them
I LOVE #1 (flower door curtain). It reminds me of Florence and other towns in Italy where many open doors of shops and restaurants dangle with hanging decorations.
#1 is great! So cute.
#18!! I love the first aid kid, what an awesome idea!
number 6!
Love #7. It's about time somebody did someting for boys. Hope this wins.
#5
#3! for sure, ORIGINAL & useful! I need 1 or 4 for my boys!
#15!!
I would love to know the blog/website for the designer of Craft #4 - Sophisticated Scrap Bracelet. I want to check it out.
I'm REALLY in love with the Travel Kit, could the creator please give themselves credit and possibly share a tutorial? Thank you so much for sharing, so many great creations!!
#1!!!!!
Post a Comment